Your location: Home Page > RFID Blog | SILION TECH > How to Program a RFID Tag: A Step-by-Step Guide, How to program a RFID tag
News and Information
How to Program a RFID Tag: A Step-by-Step Guide, How to program a RFID tag
Author:2024-12-28 14:52:04
A Step-by-Step Guide
How to program a RFID tag
RFID (Radio Frequency Identification) technology has become a cornerstone in modern industries, enabling seamless contactless communication and data storage. RFID tags, small devices embedded with microchips and antennas, are pivotal in applications such as inventory management, access control, and supply chain logistics. Programming these tags is not as daunting as it seems, provided you understand the technical process. This guide delves into the intricate steps of RFID tag programming, ensuring you master the craft effectively.

Understanding RFID Technology
Before programming a RFID tag, it’s essential to understand its components and functionality. RFID technology relies on electromagnetic fields to transfer data wirelessly between a tag and a reader. Here’s an overview of its key components:
1. RFID Tags:
o Passive Tags: Draw power from the reader’s electromagnetic field.
o Active Tags: Contain an internal power source, offering extended range.
o Semi-Passive Tags: Combine features of both passive and active tags.
2. RFID Readers/Writers:
o Devices that communicate with RFID tags to read and write data.
o Available in handheld, fixed, or integrated designs.
3. Frequency Bands:
o Low Frequency (LF): Operates at 125-134 kHz, suitable for short-range applications.
o High Frequency (HF): Operates at 13.56 MHz, commonly used in contactless payments.
o Ultra-High Frequency (UHF): Operates at 860-960 MHz, ideal for long-range tracking.
4. Memory Types:
o Read-Only: Pre-encoded data that cannot be modified.
o Write-Once: Data can be written once and locked permanently.
o Read/Write: Supports multiple rewrites.
Step 1: Gather the Required Tools
To program an RFID tag, ensure you have the following tools:
· RFID Writer/Encoder: A device capable of writing data to RFID tags.
· RFID Tags: Choose tags compatible with your writer and intended application.
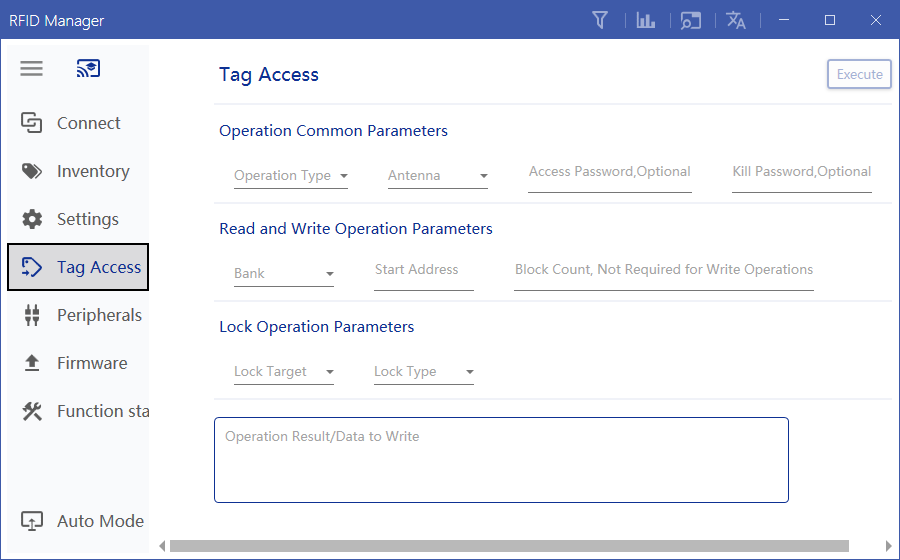
· Programming Software: Provided by the RFID hardware manufacturer, such as Silion Tech’s Reader Manager.
· Computer or Mobile Device: For running the software and managing data input.
Check compatibility among your tools to avoid technical issues.
Step 2: Install and Configure the Software
1. Install the Software:
o Download and install the RFID programming software recommended by your hardware provider.
2. Connect the RFID Writer:
o Use USB, Bluetooth, or Ethernet to connect the writer to your computer.
o Ensure proper driver installation for seamless communication.
3. Set Operating Parameters:
o Configure the frequency band (LF, HF, UHF) and region-specific settings.
o Test the setup by reading a sample tag to ensure the writer functions correctly.

Step 3: Select and Prepare the RFID Tag
1. Identify the Right Tag:
o Consider storage capacity and application requirements. For example:
§ EPC Gen 2 tags for supply chain management.
§ MIFARE tags for secure access control.
2. Verify Compatibility:
o Match the tag’s frequency and protocol with your writer.
3. Place the Tag:
o Position the tag within the operational range of the writer. Most RFID writers require tags to be within a few centimetres for programming.
Step 4: Programming the RFID Tag
1. Launch the Software:
o Open the programming software and select the "Write" or "Encode" option.
2. Input Data:
o Enter the desired data, such as unique identification numbers (UIDs), product details, or encrypted keys.
o For instance, you can encode:
§ Serial numbers for inventory.
§ Personal credentials for secure access.
3. Select Encoding Format:
o Choose the appropriate data format, such as:
§ ASCII: For alphanumeric data.
§ Hexadecimal: For compact binary representation.
4. Write Data:
o Click the "Write" button to encode the data onto the tag. The process may take a few seconds.
5. Verify the Encoding:
o Use the "Read" function to confirm the data has been accurately written.
Step 5: Test the Programmed Tag
1. Distance Testing:
o Check the readability of the tag at different distances.
2. Application Testing:
o Test the tag within its intended application, such as scanning in a warehouse or unlocking a secure door.
3. Troubleshoot Errors:
o If the tag doesn’t function as expected, recheck the encoding process and hardware settings.
Advanced Considerations
1. Data Encryption:
o Use password protection or encryption for sensitive data to prevent unauthorized access.
2. Memory Segmentation:
o Divide the tag’s memory into different sections for multiple uses. For example:
§ One section for static identification data.
§ Another for dynamic tracking information.
3. Error Correction:
o Implement error detection and correction mechanisms to ensure data integrity.
4. Compliance:
o Ensure your RFID tags comply with industry standards, such as ISO/IEC 18000 for RFID protocols.
Applications of Programmed RFID Tags
RFID tags have diverse applications across industries:
1. Retail:
o Real-time inventory tracking and theft prevention.
2. Healthcare:
o Patient identification and equipment monitoring.
3. Logistics:
o Streamlined supply chain operations and fleet management.
4. Access Control:
o Secure entry for buildings and restricted areas.
5. Event Management:
o Contactless payments and attendee tracking.
Programming an RFID tag is a crucial skill in today’s technology-driven world. By following this detailed guide, you can efficiently encode data onto RFID tags and integrate them into your desired applications. Whether it is for inventory management, access control, or asset tracking, understanding the nuances of RFID programming ensures you leverage the full potential of this transformative technology.
Next Article:RAIN RFID Protocols: Exploring EPC Gen2 and Beyond